Contents
- 0.1 What is Bottom Navigation Bar?
- 0.2 Why Bottom Navigation Bar?
- 0.3 Steps for creating Bottom Navigation Bar
- 0.3.0.1 Step 1: Create a new Android Studio Project
- 0.3.0.2 Step 2: Add the following dependencies to build.gradle file
- 0.3.0.3 Step 3: Add Vector assets to the project
- 0.3.0.4 Step 4: Add Menu resource file
- 0.3.0.5 Step 5: Add Following code to bottom_nav_bar
- 0.3.0.6 Step 6: Add Following code to where you want to implement Bottom Navigation Bar
- 0.3.0.7 Step 7: Add the Following code to MainActivity.java file
- 1 Watch this tutorial on youtube
Basically bottom navigation bar is used to let the user navigate easily through different Fragments or Activities. Some of the popular apps like Instagram, Zomato, uses Bottom Navigation Bar.
- It lets’s the user to navigate easily through different Activities/Fragements.
- Let’s the user know about the main Activies available in the App.
- It provides nice aesthetics to the app.
Step 1: Create a new Android Studio Project
To create a new Android Studio Project, open Android Studio -> Click on File -> New -> New Project. Select an Empty activity -> Click Next -> Enter the name of the Application -> Select Java Language -> Click Finish.
Step 2: Add the following dependencies to build.gradle file
dependencies {
    implementation 'com.google.android.material:material:1.2.1'
}
Step 3: Add Vector assets to the project
So for the bottom navigation bar, we will need some icons. To add these icons follow the below-mentioned steps:
Click on the app -> res -> drawable(right-click) -> New -> Vector Asset


Click on Clip Art -> search for favorite -> Select the filled heart icon and rename it to “icon_1“. We have to add 3 more icons repeat the above step to search for “music note”, “places” and “Person” and name them as “icon_2”, icon_3″, and “icon_4” respectively.

Step 4: Add Menu resource file
Now we need to add menu resource file
Right Click on the res -> New -> Android Resource File

Select “Menu” as Resource type and “bottom_nav_bar” as File name

<?xml version="1.0" encoding="utf-8"?>
<menu xmlns:android="http://schemas.android.com/apk/res/android">

    <item
        android:id="@+id/page1"
        android:enabled="true"
        android:icon="@drawable/icon_1"
        android:title="Favorites"/>

    <item
        android:id="@+id/page2"
        android:enabled="true"
        android:icon="@drawable/icon_2"
        android:title="Music"/>

    <item
        android:id="@+id/page3"
        android:enabled="true"
        android:icon="@drawable/icon_3"
        android:title="Place"/>

    <item
        android:id="@+id/page4"
        android:enabled="true"
        android:icon="@drawable/icon_4"
        android:title="Profile"/>
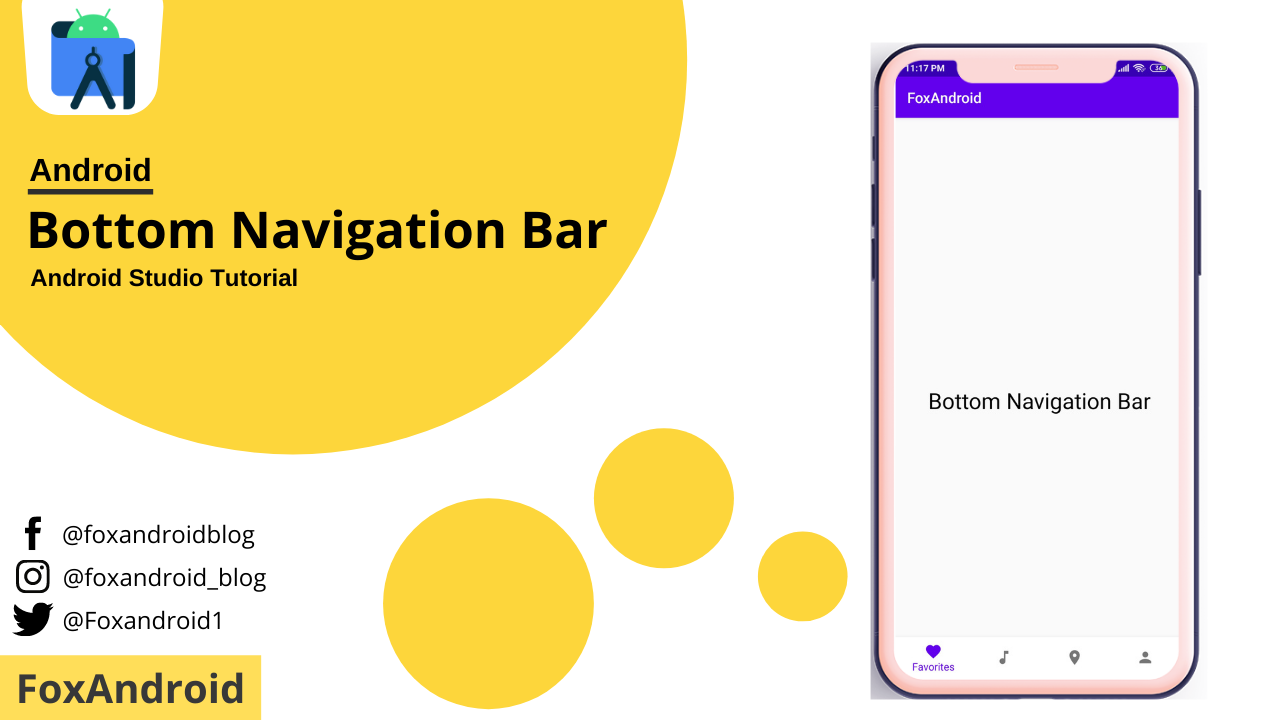
</menu><?xml version="1.0" encoding="utf-8"?>
<RelativeLayout xmlns:android="http://schemas.android.com/apk/res/android"
xmlns:app="http://schemas.android.com/apk/res-auto"
xmlns:tools="http://schemas.android.com/tools"
android:layout_width="match_parent"
android:layout_height="match_parent"
tools:context=".bottomnav">
<TextView
android:layout_width="wrap_content"
android:layout_height="wrap_content"
android:textColor="@color/black"
android:text="Bottom Navigation Bar"
android:textSize="30sp"
android:layout_centerInParent="true"/>
<com.google.android.material.bottomnavigation.BottomNavigationView
android:id="@+id/bottom_navigation"
android:layout_width="match_parent"
android:layout_height="wrap_content"
android:elevation="8dp"
app:backgroundTint="@color/white"
android:layout_alignParentBottom="true"
app:menu="@menu/bottom_nav_bar"/>
</RelativeLayout>Step 7: Add the Following code to MainActivity.java file
package com.example.helloworld;

import androidx.annotation.NonNull;
import androidx.appcompat.app.AppCompatActivity;
import android.os.Bundle;
import android.view.MenuItem;
import android.widget.Toast;

importcom.google.android.material.bottomnavigation.BottomNavigationView;

public class bottomnav extends AppCompatActivity {

    BottomNavigationView bottomNavigationView;

    @Override
    protected void onCreate(Bundle savedInstanceState) {
        super.onCreate(savedInstanceState);
        setContentView(R.layout.activity_bottomnav);
        bottomNavigationView = findViewById(R.id.bottom_navigation);
                       bottomNavigationView.setOnNavigationItemSelectedListener(new BottomNavigationView.OnNavigationItemSelectedListener() {
            @Override
            public boolean onNavigationItemSelected(@NonNull MenuItem item) {

                if (item.getItemId() == R.id.page1){

                    Toast.makeText(bottomnav.this,"Favorites is clicked",Toast.LENGTH_LONG).show();
                }else if (item.getItemId() == R.id.page2){

                    Toast.makeText(bottomnav.this,"Music is clicked",Toast.LENGTH_LONG).show();
                }else if (item.getItemId() == R.id.page3){

                    Toast.makeText(bottomnav.this,"Places is clicked",Toast.LENGTH_LONG).show();
                }else if (item.getItemId() == R.id.page4){

                    Toast.makeText(bottomnav.this,"Profile is clicked",Toast.LENGTH_LONG).show();
                }

                return true;
            }
        });

    }
}
Output : Run and Test your app!